Layers Needed
Step-by-Step Setup
-
Create the Magnet Layer
Create a Shape Layer and rename it MAGNET.
The layer's anchor point acts as the center of the magnetic attraction.
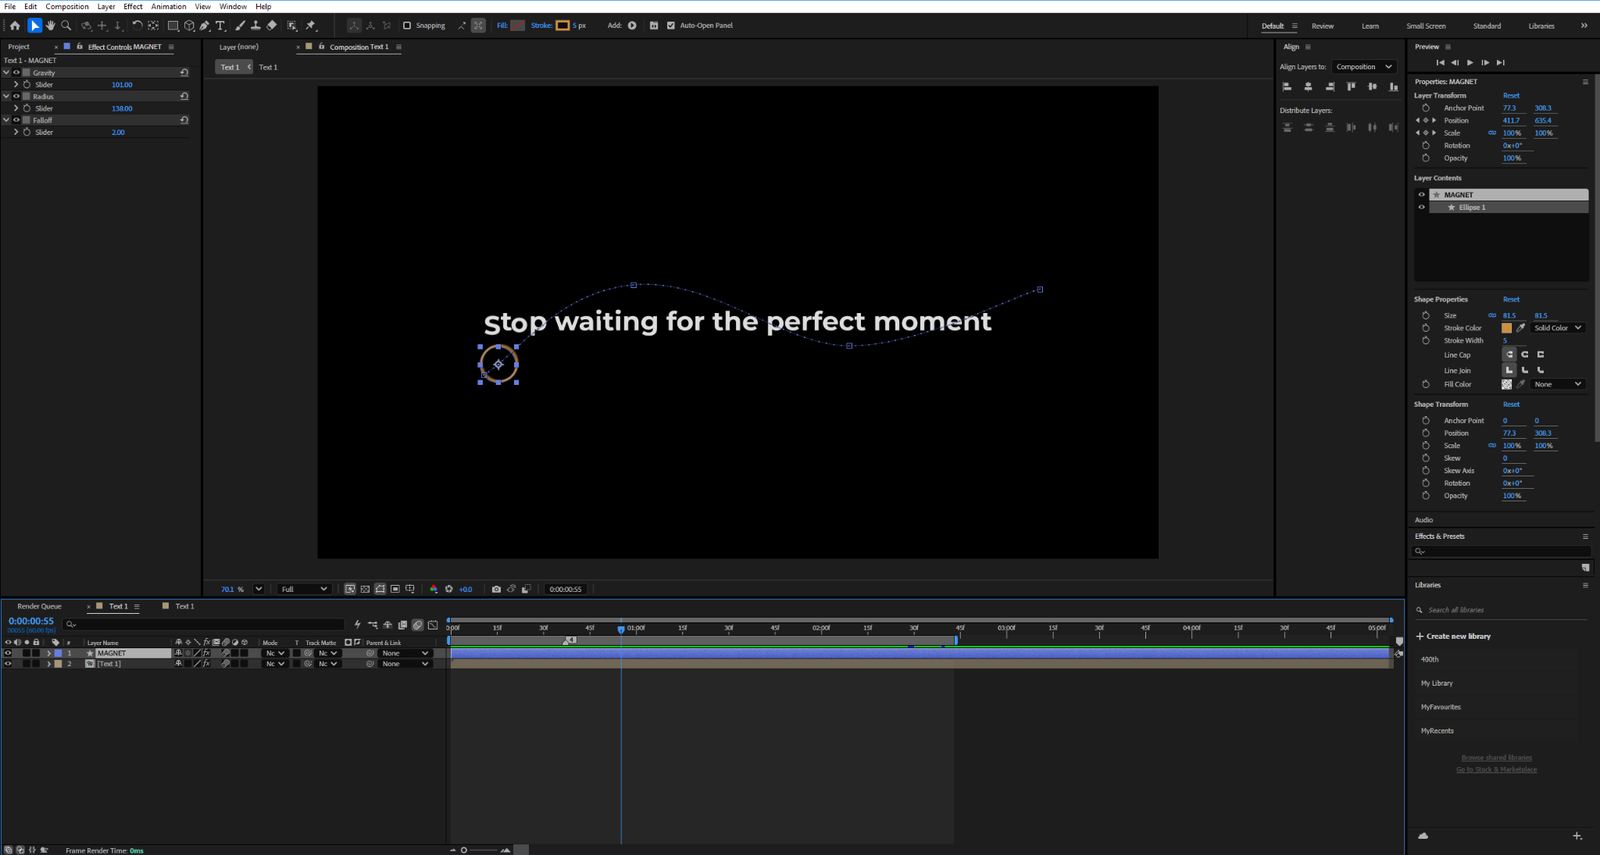
Create and position the MAGNET shape layer in the composition. -
Add Three Slider Controls
Select the MAGNET layer and go to:
Effect → Expression Controls → Slider Control
Add three sliders and rename them:
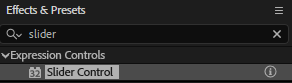
Search for Slider Control under Expression Controls. 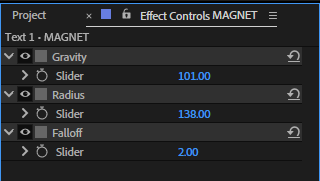
Add three controls to the MAGNET layer and rename them Gravity, Radius, and Falloff. - Gravity — controls attraction strength
- Radius — controls how far the effect reaches
- Falloff — controls how smoothly the effect fades with distance
-
Pre-compose the Text
Create your text layer and rename it Text 1.
Pre-compose the layer before applying Puppet Pins.
-
Add Puppet Position Pins
Select the pre-composed text layer and choose the Puppet Position Pin Tool.
Place pins across the letters or word wherever you want the distortion to react.
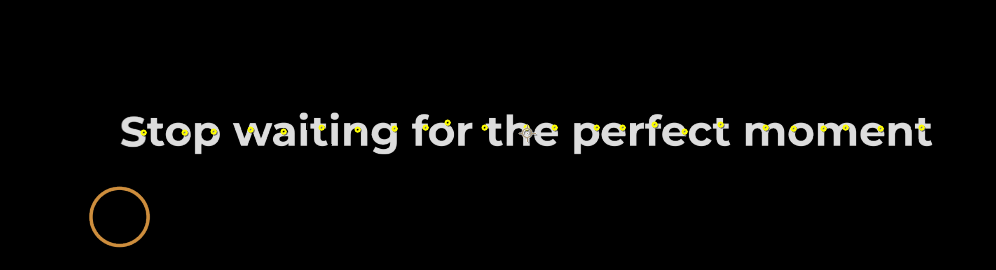
Add Puppet Position Pins across the text. Each pin can react independently to the magnet. Use more pins for finer deformation. For a simple word, one pin per letter or one pin around key intersections is often enough. -
Open a Puppet Pin Position
Open the Text layer until you reach a Puppet Pin's Position property:
Text 1
└─ Puppet
   └─ Mesh 1
      └─ Deform
         └─ Puppet Pin 1
            └─ Position
Alt-click the Position stopwatch to enable an expression.
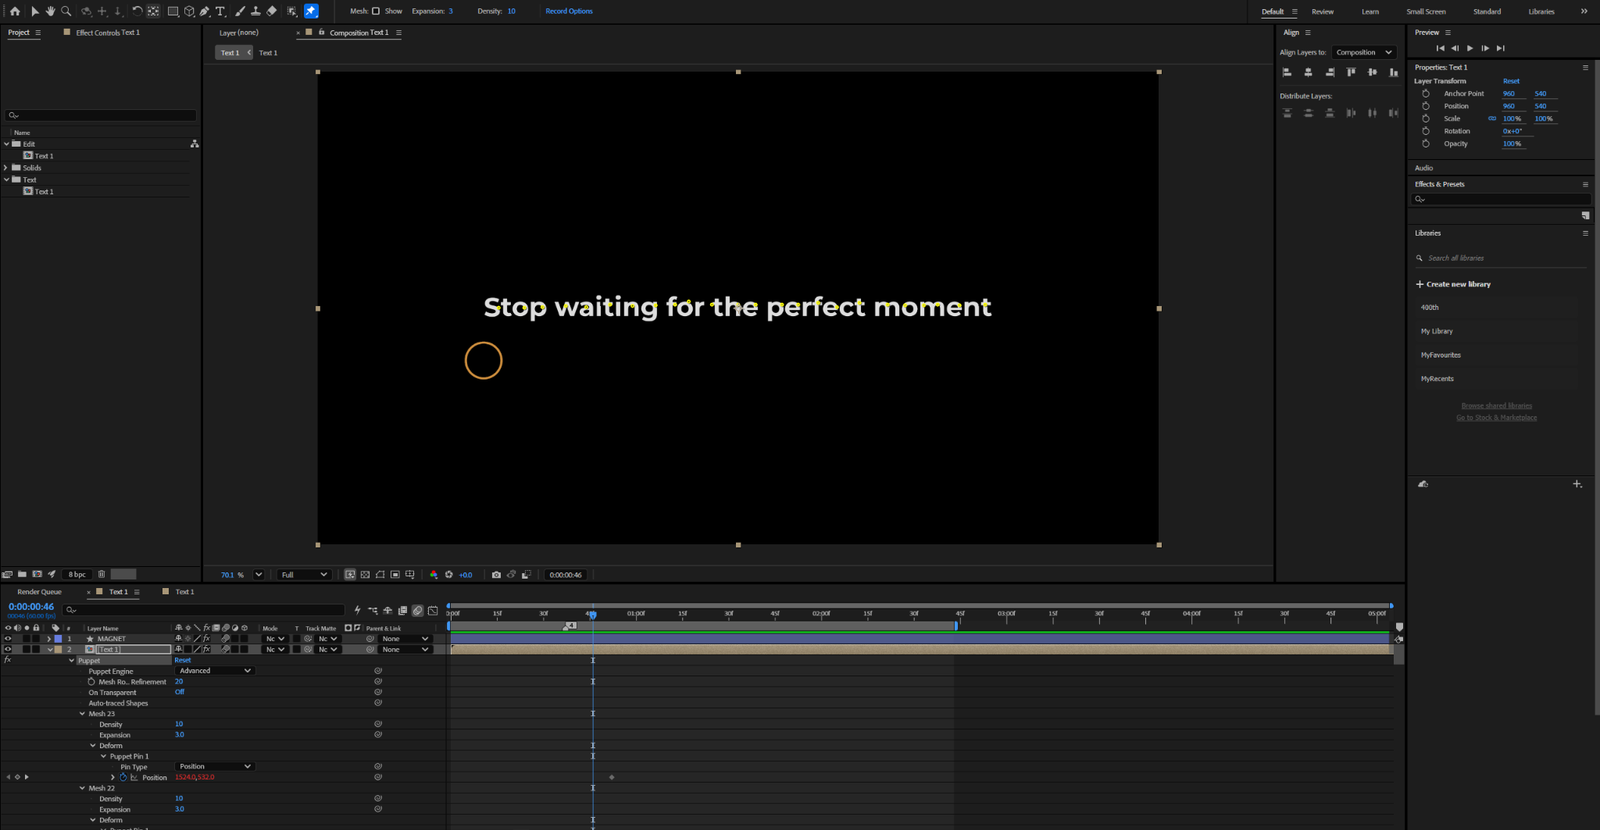
Open each Puppet Pin's Position property and paste the expression there. -
Paste the Magnetic Expression
Paste the following expression into the Puppet Pin Position property:
magnet = thisComp.layer("MAGNET"); gravity = magnet.effect("Gravity")("Slider"); radius = magnet.effect("Radius")("Slider"); falloff = magnet.effect("Falloff")("Slider"); magnetPos = magnet.toComp(magnet.anchorPoint); pinPos = thisLayer.toComp(value); d = length(pinPos, magnetPos); strength = 1 - clamp(d / radius, 0, 1); strength = Math.pow(strength, falloff); dir = magnetPos - pinPos; resultComp = pinPos + dir * strength * gravity / 100; thisLayer.fromComp(resultComp); -
Apply the Expression to Every Pin
Copy the expression and paste it onto the Position property of every Puppet Pin you want the magnet to affect.
Puppet Pin 1 → Position
Puppet Pin 2 → Position
Puppet Pin 3 → Position
Puppet Pin 4 → Position
Each pin measures its own distance from the Magnet layer, so nearby pins react more strongly than distant ones.
-
Test the Effect
Move the MAGNET layer around the composition.
The Puppet Pins should now bend and pull toward it automatically.
Recommended Starting Values
| Control | Starting Value | What It Does |
|---|---|---|
| Gravity | 50 | Controls how strongly the text is pulled toward the magnet. |
| Radius | 300 | Controls the distance of the magnetic influence. |
| Falloff | 2 | Controls how quickly the attraction becomes weaker with distance. |
Soft, Wide Distortion
Gravity: 25
Radius: 500
Falloff: 2
Strong, Tight Distortion
Gravity: 80
Radius: 200
Falloff: 4
How the Expression Works
1. Find the Magnet Position
magnetPos = magnet.toComp(magnet.anchorPoint);2. Find the Puppet Pin Position
pinPos = thisLayer.toComp(value);3. Measure the Distance
d = length(pinPos, magnetPos);4. Calculate the Influence
strength = 1 - clamp(d / radius, 0, 1);
strength = Math.pow(strength, falloff);
5. Pull the Pin Toward the Magnet
resultComp =
    pinPos +
    dir * strength * gravity / 100;
Download the Practice Project
Want to experiment with the setup instead of rebuilding it from scratch? Download the included After Effects project and test the MAGNET controls, Puppet Pins, and expression directly.
Kinetic Text — Magnetic Shape Practice File
After Effects project (.aep) included for hands-on experimentation.
See the Effect in Action
These clips show how the Puppet Pins respond as the MAGNET layer moves around the text.
Final Result
You now have a reusable magnetic text distortion system. Animate or move the MAGNET layer around the composition and the text will dynamically react to it.
This technique works well for kinetic typography, logo animation, liquid-style text, interactive motion graphics, abstract transitions, title sequences, and experimental UI-style motion.